Open topic with navigation
Importing Customers
Importing Customers from a file is a fast way to add a bulk amount of customers to a database.
It is possible to import Customers in two different methods, through the Import Data function, or the Automatic Customer Import function.
Import Data
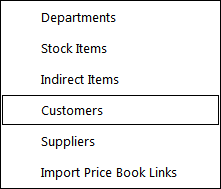
Go to Utilities > Import Data > Customers.
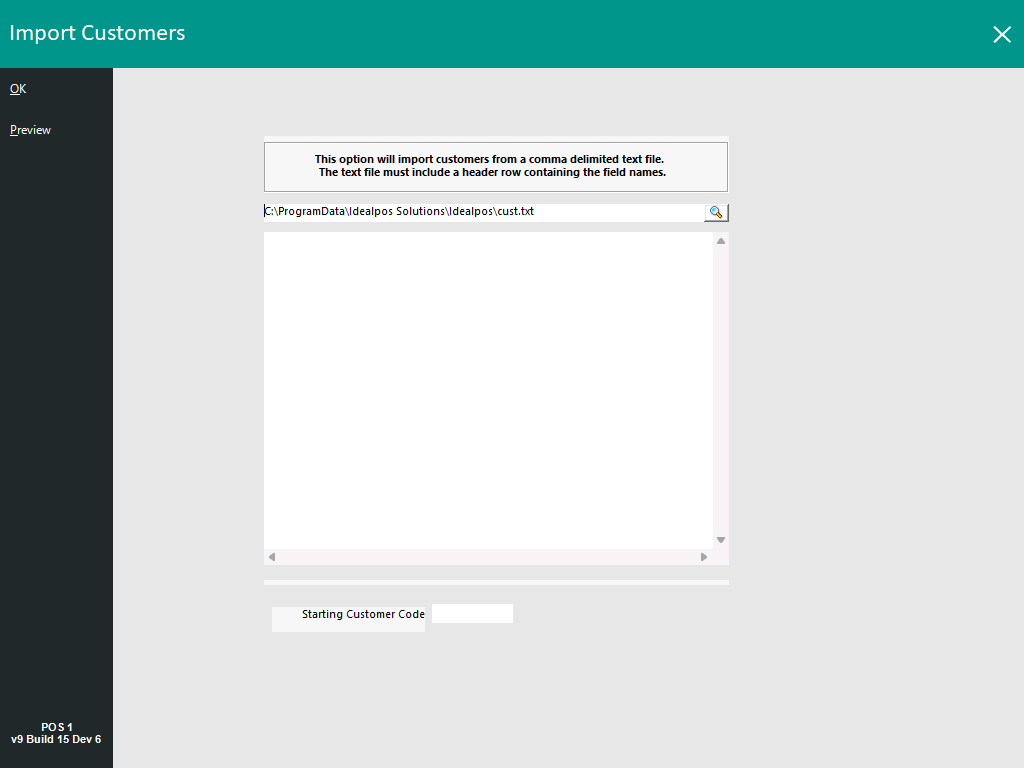
The Import Customers window will open.
Select the magnifying glass icon to browse to the folder location that contains the Customer Import File.
The format of the Customer Import File is outlined here.
Press the "OK" button on the top-left corner of the window to import the selected Customer File.
The Preview button shown on the top-left corner of the window can be pressed to preview the contents of the file that is currently specified in the import file path; the Preview will appear in the field below the folder path.
Note that in most cases, the Preview button does not need to be pressed as the file is automatically previewed after it has been selected via the magnifying glass icon.
The Preview button is mostly used if a path to an import file has been manually entered or pasted into the import file path.
The Preview button can also be pressed to preview the contents of the import file if the import file has changed after it was selected via the magnifying glass button.
Information regarding CODE/Starting Stock Code/Starting Customer Code
When importing Stock Items or Customers via the Import function, there are two methods that can be used for assigning CODES to the Imported Items/Customers.
- Method 1 - Import Stock Items/Customers using the CODE specified in the Import File
When using this method, ensure that a CODE header is specified in the Import File.
Ensure that the CODE field is populated and is not blank.
If the CODE field is blank, the Stock Items/Customers will not be imported!
When using this method, also note that the Starting Stock Code/Starting Customer Code will not be used and any value entered into this field will be ignored.
- Method 2 - Import Stock Items/Customers without CODES
When using this method, ensure that a CODE header is NOT specified in the Import File.
Within the Starting Stock Code or Starting Customer Code, enter a Starting Code.
Idealpos will automatically assign a CODE to the Stock Items/Customers during the import.
The CODE will be incremented for each Stock Item/Customer that is imported.
Automatic Customer Import
Note!
In Idealpos V10 Build 1 and newer, Automatic Customer Import functionality requires "Auto Customer Import" to be enabled in the Licence Gateway!
Refer to Idealpos or your Idealpos Reseller to purchase this module.
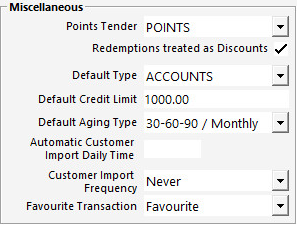
Go to: Back Office > Setup > Global Options > Customers > Miscellaneous.
- Automatic Customer Import Daily Time: Enter a time in 24 hour format which the Customer Import will take place.
And/Or
- Customer Import Frequency: Select a frequency which the Customer Import file will be imported. Options available are: Never, 1 minute, 2 minutes, 5 minutes, 10 minutes.
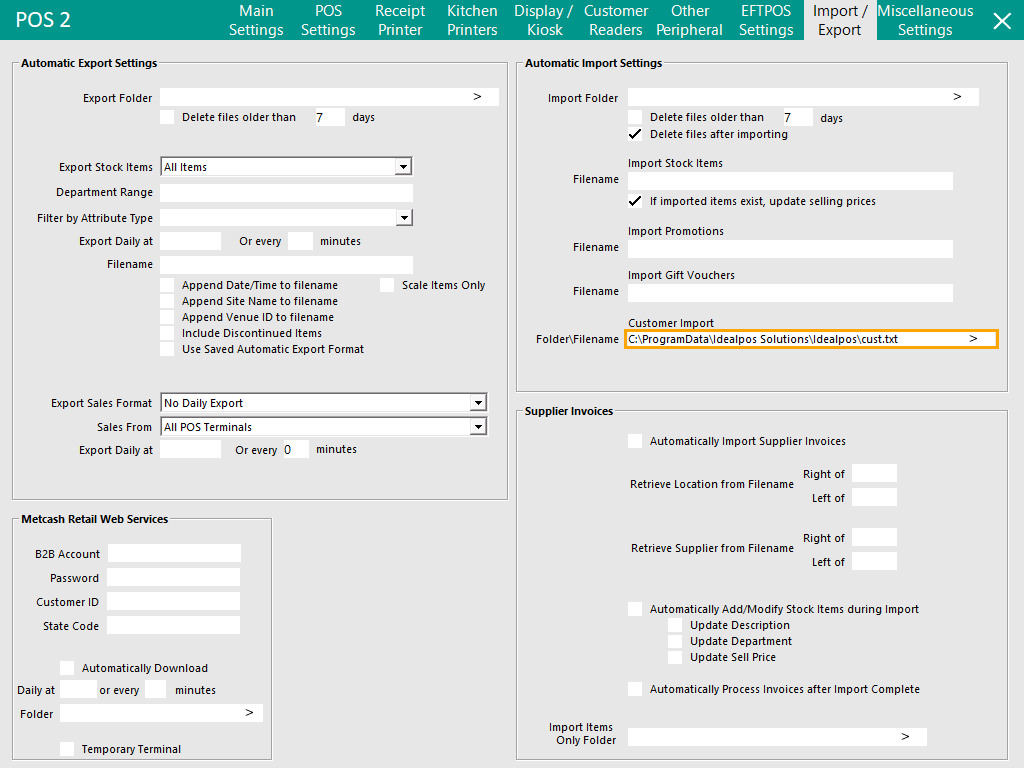
Go to: Back Office > Setup > POS Terminals > Modify > Import/Export > Automatic Import Settings.
- Customer Import Folder\Filename: This will default to C:\ProgramData\Idealpos Solutions\Idealpos\cust.txt; this can be customised with a Folder and Filename or with a Folder; see below for more info.
- Option A - Specify a folder path and a filename - Idealpos will only import the specified filename from the specified location.
- Option B - Specify a folder path without a filename - Idealpos will import any txt file that is placed within the specified folder.
Note that if multiple files are placed into the folder, Idealpos will only import one file at a time using the "Customer Import Frequency" setting or "Automatic Customer Import Daily Time" setting configured in Global Options as shown above.
Also note that if any non-Customer txt file are placed in the folder location, Idealpos will attempt to import them, and this will trigger problems if the file(s) placed in the folder are not formatted in the expected format.
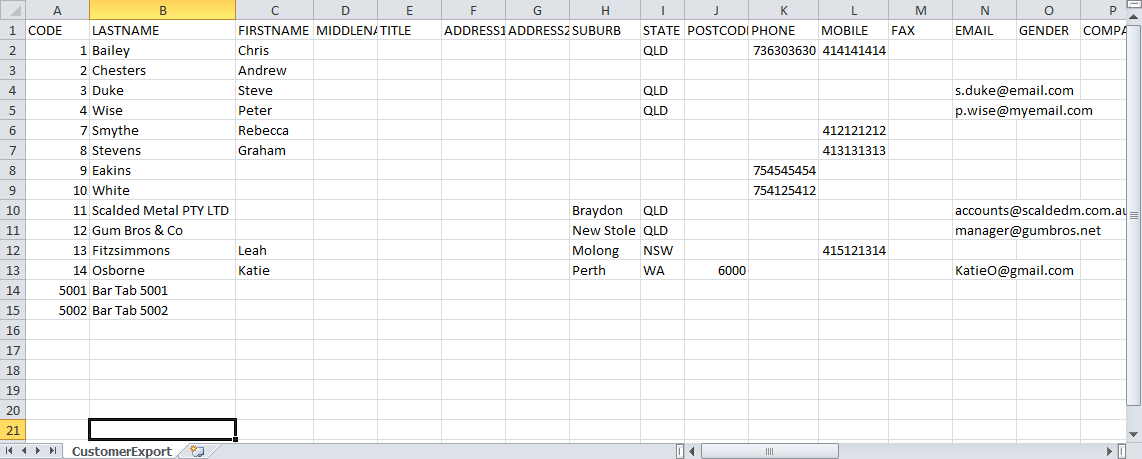
Below is an example of a .csv file used to import Customers.
As you can see, not every field that can be imported is utilised.
More information on importing customers (such as all the Customer fields available for importing) can be found in the Import Customers section of the Import Data topic.
Minimum Requirement for Import:
- Fields: CODE, LASTNAME
- File Name: The import file must be called cust.txt
- Location: In v9 Build 13 and older, the file is read from: C:\ProgramData\Idealpos Solutions\Idealpos or C:\Documents and Settings\All Users\Application Data\Idealpos Solutions\Idealpos. The file is automatically deleted after being successfully read.
In v9 Build 14 and newer, the file is read from the Customer Import Folder\Filename path specified in Back Office > Setup > POS Terminals > Modify > Import/Export > Automatic Import Settings > Customer Import Folder\Filename. The file is automatically deleted after being successfully read.
Note: When importing Customers as Bar Tabs:
1. Set the BARTAB field to 1
2. The Code field must be 6 or less alphanumeric characters
Open topic with navigation